Set up a toolbar button for BOLTS
This is a adapted and slightly extended version of a description from the FreeCAD wiki.
You need to have installed BOLTS for FreeCAD.
Open the Customize dialog
It can be found at Tools->Customize. Select the macros tab. If you get an error message make sure you have BOLTS for FreeCAD installed.
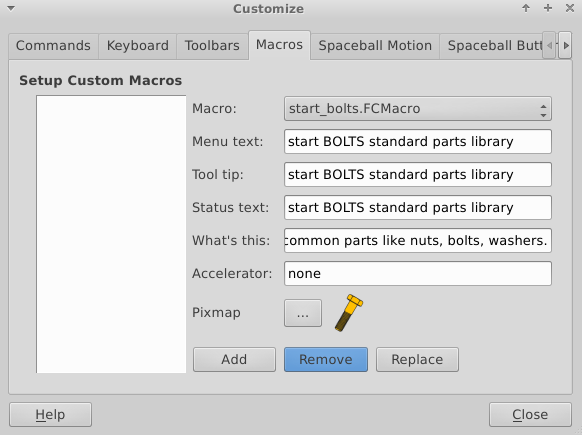
Select the macro and fill in fields
Select the start_bolts.FCMacro from the drop-down list. The various fields
can be filled with start BOLTS standard parts library or something similar.
Then click on the three dots next to Pixmap, choose add icons and navigate to
the BOLTS folder in your macro path (this might be tricky, as the macro folder
is hidden). Add the subfolder icons by clicking Open. Finally choose the
golden bolt icon with filename bolts32.png.
When you are done, it should look like this:
Confirm the custom macro
You do this by clicking the Add button.
If you want to change something afterwards, you can select the custom macro in
the list on the left by double clicking, make your changes, and confirm them by
clicking on the Replace button.
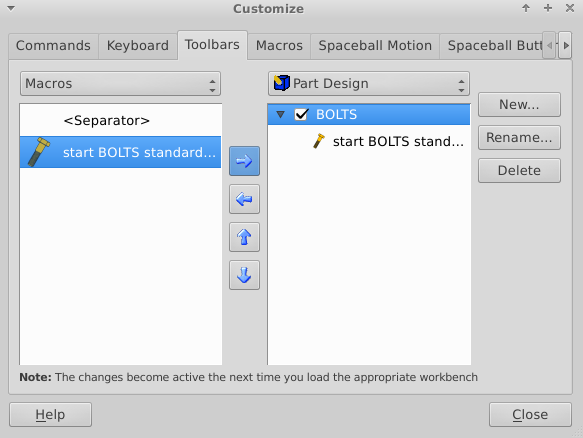
Create a new toolbar and add the button
In the Customize dialog select the toolbar tab. On the left drop-down list select macros, on the right select the workbench in which you want to create the toolbar button.
Then create a new toolbar by clicking New... and call it BOLTS. The start
macro can be added by selecting it in the left list and clicking on the
right-facing arrow.
When you are done, it should look like this:
Then close the Customize dialog.
Try it
Switch to the workbench where you added the toolbar in the previous step. Or switch away and back if this toolbar is currently active.
You now should have a new toolbar, and a click on the yellow bolt icon should open the BOLTS standard part selector.
Next steps
You can now learn how to use BOLTS for FreeCAD.